Adding User Groups
After adding a user as shown here, the user must be added to a User Group. Either create a new User Group or use one of the provided predefined User Groups. If it's a new User Group, attach a policy to it as shown here.
You can assign a user to multiple User Groups.
In addition to adding your own User Groups, you can use a predefined User Groups.
|
●
|
SuperAdmin creates an enterprise Admin who adds users and assigns each to a user group. |
|
●
|
The enterprise Admin can change a user’s user group. |
|
✔
|
If Admin assigns the user the group VAIC_Users, for example, that user will not see the Monitor (Grafana) menu option in VAIC. |
|
✔
|
If Admin assigns the user the group VAIC_Grafana_Viewers, for example, that user will see the Monitor menu option in VAIC and will be able to access and view Grafana. |
|
✔
|
If Admin assigns the user the group VAIC_Grafana_Editors, for example, that user will see the Monitor menu option in VAIC and will be able to access, view and perform certain edits to Grafana. |
|
✔
|
If Admin assigns the user the group VAIC_Grafana_Admin, for example, that user will become an Admin with all Admin privileges. Admins have almost all VAIC roles, users management and Grafana administration. |
|
1.
|
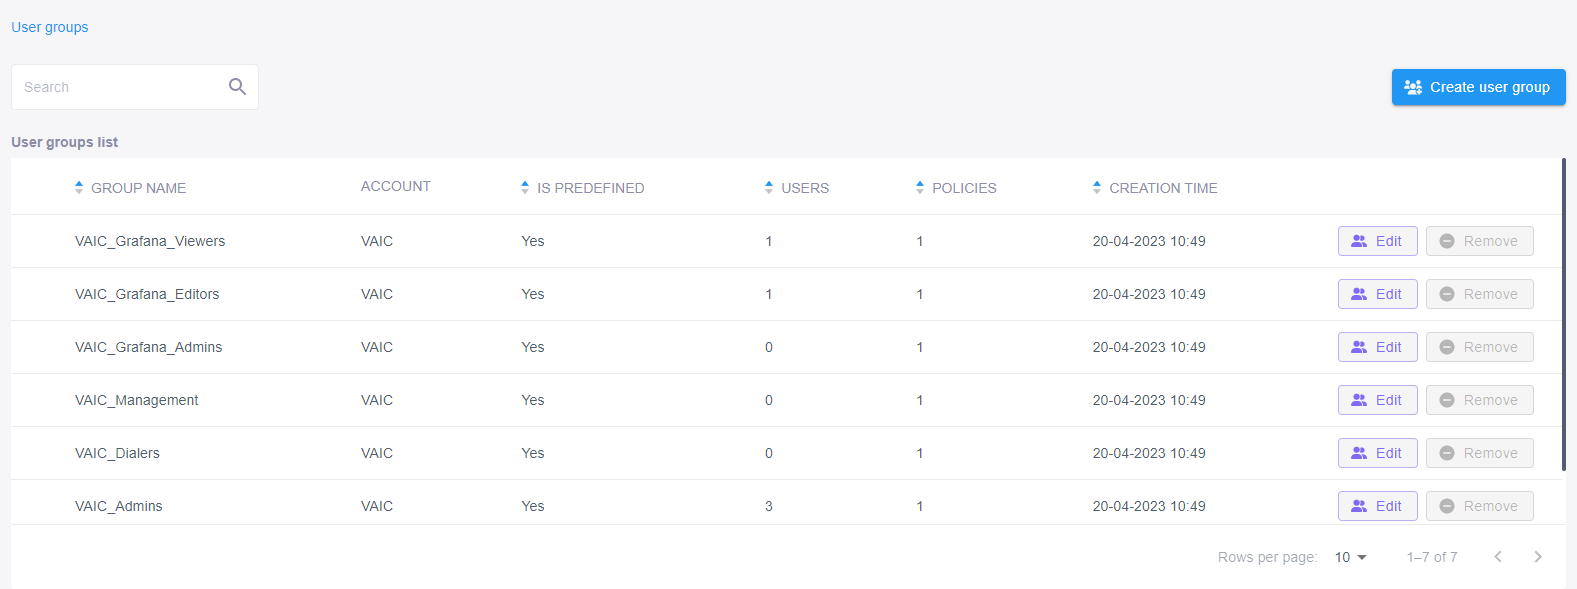
In the navigation menu, click User Groups. |
|
2.
|
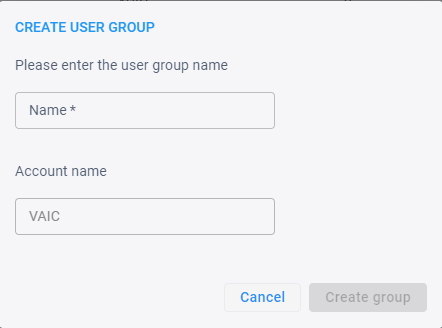
Click Create user group. |
|
3.
|
Use the next table as reference. |
|
Parameter
|
|
| Name |
Enter a name for the User Group. Choose an intuitive name for effective management later. |
| Account name |
[Read-only] Displays the VoiceAI Connect account name. |
|
4.
|
Click the Create group button. |
|
5.
|
After adding a user group, you can |
|
●
|
attach a policy to it - see here for more information. |
|
●
|
attach a user to it - see here for more information. |
|
●
|
add an application to it - see here for more information |